Self-Help Guide to Leather Car Seat Repair
Over the years, the surface of car leather seats has developed cracks, numerous scratches, and other signs of damage that can worsen the appearance of the product and reveal the age of the car.
Careful use and proper care for a leather interior can certainly work wonders and prevent the appearance of numerous cracks and scratches, but it is unlikely that their occurrence can be completely avoided.
This self-help guide contains a few simple steps that will help you restore the condition of your car’s leather seats.
Restoration of the Leather Interior
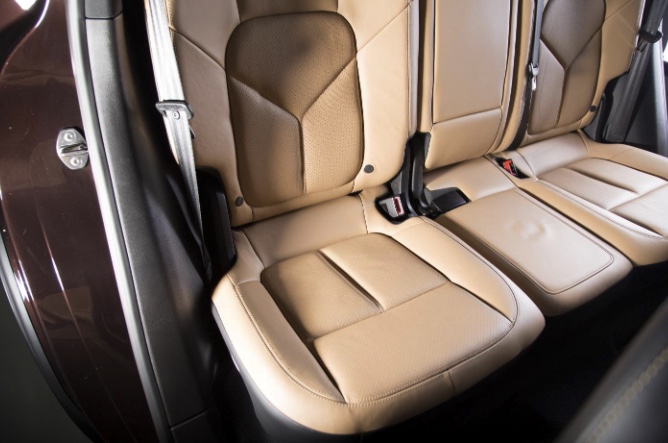
Imagine finding the near-perfect condition car of your dreams on specialized sites like hyundai auctions or other brand-specific selling platforms, only to be disappointed by the poor condition of its leather seats. Don’t give it up too quickly, though! Modern approaches make it possible to repair leather products even after severe damage such as rupture or abrasion.
What’s even better is that everything can be done by yourself, and it will be much cheaper than any specialized car repair salon can offer. Although, you should be ready to do some serious work.
Firstly, repairing leather seats will require a lot of materials, such as:
- liquid leather;
- dye;
- restoration kit (glue, tweezers, scissors, various spatulas and utensils for repair compounds);
- degreaser;
- plastic mesh (if it is necessary to seal the hole);
- sandpaper with very fine grain (800-1000-2000);
- hairdryer or alternative heat source.
Gather all these items, roll up your sleeves, and prepare for some exciting craftsmanship.
Repairing Leather Car Seats Step by Step
Depending on the damage to your leather seat, you may need to follow all or only some of the below steps:
- Clean the surface area first, getting rid of any dirt, dust, and contaminants by using detergents and a degreaser. After the cleaning procedure, let the skin dry thoroughly.
- If you have bigger damage, such as holes or tears that require more serious repairs, you’d need to clean the edges of those and, if possible, trim them.
- Cover with a patch of thin fabric or a fine mesh, which will act as a reinforcing material. Take your glue, apply it to the patch, and wait for the whole thing to dry.
- Treat the surface with sandpaper, degrease, and apply liquid leather or an alternative material with similar properties to the leather surface.
- Let the applied material dry. A hairdryer can help speed things up, just be careful not to overdo it and dry out the surface too much.
- Take fine-grained sandpaper and proceed to sand the surface. Your task is to bring the surface to a condition where you will not feel the transition between the patch and the untreated leather with your fingers.
- Paint the area if needed. Multiple stages are involved in the painting process, influenced by the surface’s damage and the paint’s attributes. Apply the paint with caution to avoid damaging other interior areas.
That’s it. This manual work can save you money and provide a great sense of satisfaction and accomplishment.
Final Thoughts
Before restoring the leather interior of a car, consider practicing on simpler leather products, for example, an old leather jacket or shoes that you no longer wear. This will allow you to hone your skills and approach the process of repairing leather seats with a certain experience.
If everything goes well during the practicing process, you can proceed directly to restoring the leather interior of your car. Good luck, mate!
Check live fuel prices near you before you set off.
Spotted something? Got a story? Email news (@) deeside.com
NEW: Add Deeside.com as a preferred source on Google to see more of our trusted coverage when you search.
Latest News